How To Hang Plug In Pendant Light [Quick Guide]
hello rowabiPendant lights are the perfect way to add style and personality to any room—whether it’s a cozy bedroom, a chic living room, or a stylish lounge. For a bold look, pair them with a chandelier to create a show-stopping lighting combination.
The best part? Plug-in pendant lights offer all the charm without the hassle of complicated installations. No electrician, no fuss—just instant elegance.
In this post, we’ll guide you through the quick and easy steps to hang a plug-in pendant light and share why they’re a must-have for your home. Let’s get started!
How to hang a plug-in pendant light? (step by step)
Installing a plug-in pendant light is a quick way to brighten up your room without committing to complex electrical work. Here’s a detailed, professional walkthrough to help you get the job done:
Step 1: Plan Your hanging location
Begin by choosing where you want your pendant light to hang. Look for a spot near an existing electrical outlet, ensuring the power cord can comfortably reach it. If the distance is too great, you have two options of either moving the light closer to the outlet or consulting a licensed electrician if you need a new outlet in your preferred spot.
Pro tip: Make sure your chosen spot provides adequate lighting for tasks or ambiance without creating an obstacle in a high-traffic area.

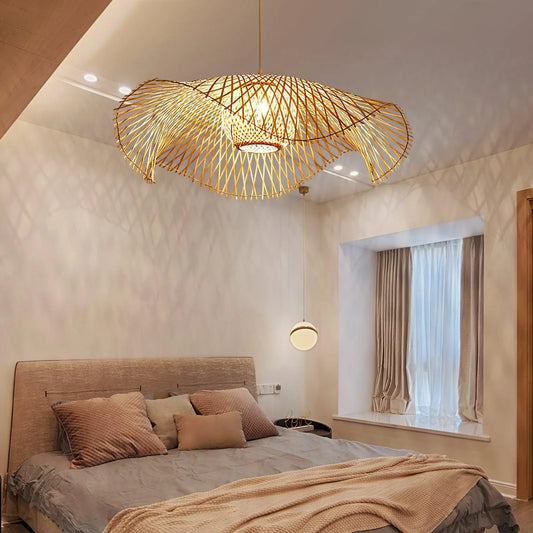
For tasks like reading in the bedroom, hang the pendant low enough to provide focused light without casting shadows. Source: Urban Cottage Industry (1)
Step 2: Unbox and inspect all parts
Carefully remove the pendant light from its packaging, then place all components on a clean, flat surface. Take a moment to review the manufacturer’s instructions to confirm that you have every piece required (hooks, mounting hardware, cord, etc.). This quick check can save you time and hassle later on.
Pro tip: Keep the box and any packing materials nearby. If a piece is missing or you decide to return the fixture, having the original packaging handy will be a time-saver.
Step 3: Set up the hanging mechanism
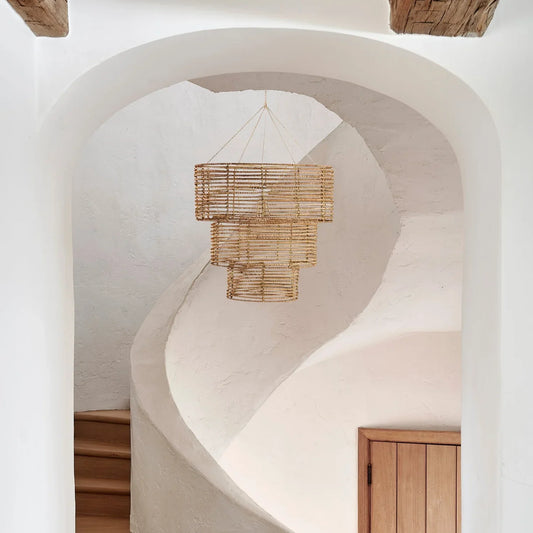
Most plug-in pendant lights come with either a hook or a bracket that you’ll secure to the ceiling or wall. To begin, locate a stud or use appropriate anchors—especially if you’re hanging the fixture from the ceiling—to ensure the hook can safely support its weight.
A stud finder or drywall anchors can help with this step. Once you’ve identified the correct spot, mark it with a pencil and install the hook or bracket according to the manufacturer’s guidelines.

If it feels unsteady, reinforce it with additional anchors or a sturdier attachment method. Source: Rowabi (2)
Pro tip: Always double-check height and alignment before permanently fixing the hook. Stand back to see if the placement aligns with your room’s layout.
Step 4: Hang the pendant light
Gently drape the cord over the hook or feed it through any provided hardware. Position the fixture at your desired height. If you need to adjust the length, simply wrap or unwind the cord around the hook until you find the perfect height.
Pro tip: Aim for a height that’s practical (above eye level if it’s a reading light) and aesthetically pleasing—too high and the fixture may not illuminate effectively; too low and it could be in your way.
Step 5: Plug in and test
Now comes the easiest part: plug the pendant light into the outlet and switch it on. Check if it lights up as expected, and ensure there are no flickering or loose connections.

Once the hook is secure, hang your pendant light and adjust the cord. Source: MooBoo Home (3)
Pro tip: If the outlet is in a visible spot, you can use cord clips or concealers to neatly guide the cable along the wall or molding for a cleaner look.
Step 6: Adjust as needed
Fine-tuning the height or position of the fixture is simple—add or remove wraps of the cord around the hook, or slightly shift the location of the hook if necessary. Don’t be afraid to experiment until you achieve the ideal look and lighting coverage.
Pro tip: If you frequently change your room’s layout or need flexibility, consider installing additional hooks in different positions. This way, you can easily re-hang the pendant light as your needs evolve.
Advantages of plug-in pendant lighting
Plug-in pendant lights provide numerous advantages for both homeowners and interior designers. Among the most significant benefits are:
Simple setup
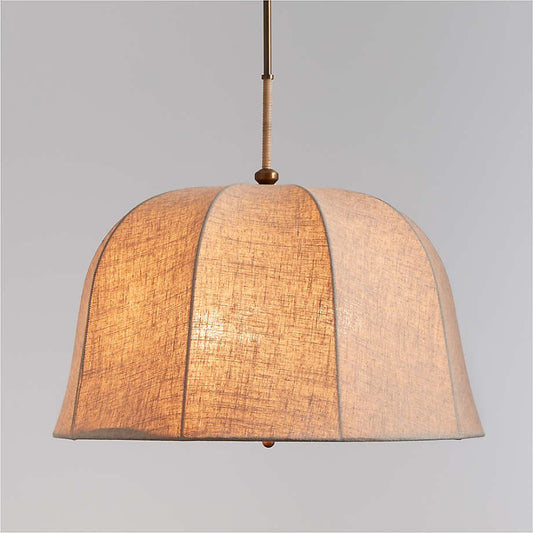
One of the greatest perks of a plug-in pendant light is that it doesn’t require hardwiring or complex electrical work. Simply unbox the fixture, position it where you’d like, and plug it into a nearby outlet.

It’s as close to “instant lighting” as you can get. Source: B&Q (4)
This ease of installation makes it particularly well-suited for renters or anyone uncomfortable with electrical tasks—though, if you lack experience, consulting a professional electrician is always recommended to ensure safety. Because there’s no need to modify existing wiring, you can enjoy your new lighting feature with minimal effort or risk.
Flexibility
Plug-in pendant lights offer the advantage of being easily relocated and adjusted, making them an excellent choice for renters or homeowners who enjoy frequently updating their decor.
They can be easily moved and adjusted to accommodate evolving tastes or room layouts—ideal for renters or homeowners who love refreshing their decor. Unlike hardwired fixtures, which are permanently anchored to a specific location, plug-in pendants give you the freedom to position them anywhere an outlet is available.
Whether you’re rearranging furniture or relocating the light for better illumination, you won’t have to deal with the hassle of rewiring or hiring an electrician. It’s a hassle-free way to keep your lighting current with your design preferences.
Budget-friendly
Because plug-in pendant lights sidestep the need for hardwiring, they often come at a lower price point than hardwired alternatives. The savings are even more apparent when you factor in the potential costs of hiring an electrician for installation or rewiring.

You simply hang the fixture and plug it in—no extra labor or hidden expenses. Source: Lights.co.uk (5)
By eliminating that extra expense, you can invest in higher-quality fixtures or simply keep more money in your pocket. It’s a win-win situation for those looking to update their lighting without breaking the bank.
Conclusion
There you go! Everything you need to know about installing a plug-in pendant light from the ceiling. Hanging a plug-in pendant light is an excellent way to enhance both illumination and aesthetics in any space.
By following a few straightforward steps, you can have your new lighting fixture operational in no time. We hope this guide has been useful and that you're now prepared to install your new light fixture effortlessly.
If you have any questions or encounter any issues while hanging your light, please feel free to contact us for assistance. We would be glad to guide you through the installation process step by step. Thank you for reading!
Source:
- [1]: https://cdn.shopify.com/s/files/1/0671/8711/4281/files/shelf-hung-plug-in-pendant-light.jpg
- [2]: https://cdn.shopify.com/s/files/1/0629/8576/5122/files/hang-this-stylish-pendant-effortlessly-with-our-instructions.jpg
- [3]: https://www.mooboohome.co.uk/cdn/shop/files/plug-in-pendant-cable-set-mooboo-home-11.jpg?v=1715264212&width=1946
- [4]: https://media.diy.com/is/image/KingfisherDigital/litecraft-white-senna-black-cable-plug-in-ceiling-pendant~5063103003762_01c_MP?$MOB_PREV$&$width=600&$height=600
- [5]: https://lw-cdn.com/images/466DFEF81F3C/k_8d988fc7f84b97ba112d528d0d0d85c7;w_1600;h_1600;q_100/10036327.jpg