How to Install a Ceiling Light Without Existing Wiring
hello rowabi
In this post, KLOE walks you through each step of installing a ceiling light when no wiring exists—and breaks down the cost of hiring a pro. From planning to final switch-on, we’ve got you covered!
Ever dreamed of a show-stopping chandelier in your home bar, only to discover there’s no overhead lighting setup? Don’t let that stop you! We faced the same challenge and decided to bring in brand-new wiring exactly where we needed it.
- How to install a ceiling light without wiring?
- DIY or hire an electrician
- Finding an electrician
- Tapping into electricity from a nearby outlet
- Connecting the light switch
- Trimming drywall
- Connecting the new light fixture
- Setting up the new light
- Fixing the drywall
- What is the cost of installing wiring for a new ceiling light?
- Is it possible to install a light fixture in any room?
- Tips for installing a new light
- Conclusion
How to install a ceiling light without wiring?
Whether you plan to take on the project yourself or hire an electrician, understanding the key steps and necessary precautions can save time, ensure safety, and produce professional-looking results. Here’s a concise guide to help you get started.
DIY or hire an electrician
The initial step in installing a ceiling light without existing wiring is to decide whether you will tackle the project yourself or hire a professional electrician. If you have some electrical knowledge, you might be able to handle it on your own (we’ve outlined the steps our electrician followed below).
However, wiring a new light fixture is more complex than simple tasks like replacing a light bulb. Given our limited experience with electrical work, we chose to hire an electrician.
Finding an electrician
We have engaged electricians for various projects, both large and small, and have consistently had positive experiences. Additionally, this approach allows us to easily obtain multiple quotes for the project.
When searching for an electrician, we used two main criteria to find the right candidate:
- Their reviews and ratings on Thumbtack (we required a minimum of 4 stars)
- Their availability
Next, you could gather quotes from at least two or three candidates to discuss the scope of work, which includes running new wiring, potentially cutting into drywall, and patching up after the job.
Always verify the electrician’s license, bonding, and insurance status, as this ensures accountability and protects both you and the contractor in case of any complications.

Always make sure to carefully verify before deciding to hire any electrician. Source: Checkatrade (1)
Tapping into electricity from a nearby outlet
Start by finding an electrical outlet close to where you want your new light fixture. Test it with a voltage tester to confirm it’s working. Next, turn off power at the circuit breaker for that outlet and verify it’s fully de-energized by testing again.
Once you’re certain the power is off, splice in a new cable (e.g., 14/2 or 12/2, depending on local code) inside the outlet’s electrical box. Match hot to hot (black), neutral to neutral (white), and ground to ground (green/bare). Secure each connection with wire nuts, ensuring they’re tight and protected.
Finally, measure the distance between the outlet and your fixture location to ensure the cable is long enough, then neatly place everything back into the electrical box before restoring power.
Connecting the light switch
Now that you have a power source, it's time to decide where to place your new light switch and fixture. You'll need to cut the existing drywall to accommodate the switch and light fixture.
Generally, it's best to install the light switch box and switch next to a wall stud. Utilize a stud finder to identify the location of the studs in the wall, as they will provide support for your new light.

Once you’ve chosen a power source and fixture placement, the next key step is wiring the light switch. Source: The Home Depot (2)
After locating the studs, use a drywall saw to create an opening for the light switch box. Once the hole is made, insert the light switch box and secure it to the stud with screws.
Trimming drywall
Based on where your light switch and new light fixture are situated, it might be necessary to cut openings in the drywall of your wall and ceiling to install the lighting. Our electrician had to make two holes (approximately 4″ x 8″) at the junction of the wall and ceiling to properly route the wiring.
Connecting the new light fixture
From that point, you can start installing the new light fixture. Measuring and cutting the cable that will run from the power source (outlet or switch) to the fixture. Use the correct gauge (often 14/2 or 12/2) based on your local code and fixture requirements.
Next, match each wire by color:
- Black (Hot) → Fixture’s hot wire
- White (Neutral) → Fixture’s neutral wire
- Green or Bare (Ground) → Fixture’s ground wire
Secure the connections with wire nuts, ensuring no bare metal is exposed. If you’re unsure about any step—like wire gauge, amperage, or grounding—refer to the fixture’s manual or consult an electrician.

Use wire connectors to secure each splice tightly, making sure no exposed wire is left. Source: Family Handyman (3)
After confirming the wiring, mount the fixture by attaching its base or bracket to a ceiling box (or other secure mounting point) as directed by the manufacturer. Once the fixture is firmly in place, turn the power back on at the breaker, test the light, and make any final adjustments or height changes as needed.
Setting up the new light
Now that your light switch is wired, it's time to set up the light fixture.
Start by attaching the base of your new light to the ceiling box you installed earlier. Then, connect the wires from your switch to the light fixture and make sure they are tightly secured.
Lastly, double-check that everything is secure, turn on the power, and test your new light to confirm it functions correctly.
Tighten the fixture in place according to the manufacturer’s instructions. Source: The Grit and Polish (4)
Fixing the drywall
If you had to create openings in your drywall to install the wiring, you'll need to fix those openings after putting up your light fixture.
Depending on how large the holes are, you can either hire a professional, purchase a drywall repair kit, or do it yourself.
For our holes, we chose to handle the repairs ourselves by patching them. Most home improvement stores offer smaller pieces of drywall suitable for such tasks. We cut the drywall to fit properly and then secured it from above using small wooden pieces and screws.
What is the cost of installing wiring for a new ceiling light?
In our case, the electrician charged $200 to install wiring for a new ceiling light. This price included both labor and the basic materials needed, such as wire and a light switch.
While costs can fluctuate based on factors like local labor rates, the complexity of your home’s electrical setup, and whether any ceiling modifications are necessary, $200 is a reasonable ballpark figure for a standard project of this type.
The entire installation took about two hours to complete, which we considered both fair and efficient. If you’re thinking of wiring the fixture yourself, be sure to follow all appropriate safety precautions. That includes turning off the power at the breaker, using a voltage tester to confirm the circuit is de-energized, and adhering to local electrical codes.
Consult an electrician or the specific fixture’s installation manual whenever you’re unsure about wiring requirements, grounding methods, or code compliance. With the right tools, knowledge, and careful approach, it’s possible to complete this as a DIY project—though professional help can provide added peace of mind and ensure everything is set up correctly.
Is it possible to install a light fixture in any room?
Certainly! You can add a light fixture in any room as long as there is accessible power to connect to. If not, you would need to bring new power into the room, which is doable but certainly more complicated.
There may also be specific conditions that could complicate or increase the cost of installation in certain areas. For instance, if your ceiling is elevated or has complex wiring, putting in a new light fixture might prove to be more difficult.

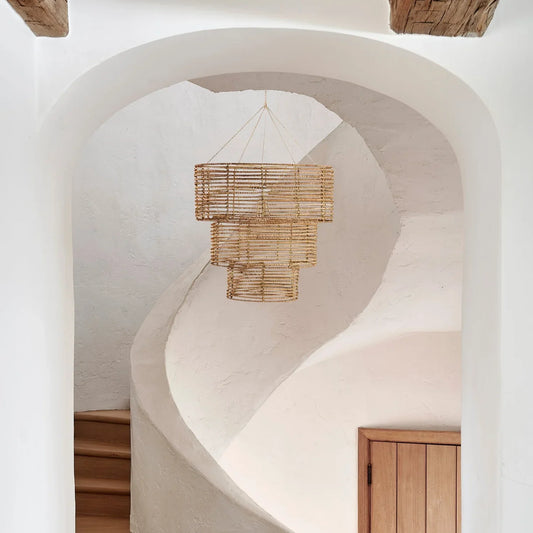
Installing a new light fixture can dramatically transform the ambiance of any space. Source: Aiwen Lighting (5)
Nonetheless, with the appropriate tools and expertise, installing a new ceiling light can be a straightforward and budget-friendly DIY task for any area in your house.
Tips for installing a new light
Proper planning and careful execution are crucial when adding a new light fixture to your home. Whether you’re doing it yourself or bringing in an electrician, the following guidelines will help you maintain safety, streamline the process, and achieve the best possible outcome.
Shut off the power
Before any electrical work, always turn off the power at the circuit breaker. Use a voltage tester to confirm the circuit is fully de-energized. This step is non-negotiable for ensuring everyone’s safety.
Choose a compatible switch or dimmer
Select a switch or dimmer that suits both your home’s wiring setup and your personal style. Electricians often use a basic $1 switch for straightforward installations, but if you’d like a dimmer or a specific aesthetic, purchase it ahead of time to ensure it’s ready for wiring.
Plan the switch and fixture location
Decide exactly where you want the new light and its corresponding switch before starting. A clear plan reduces last-minute adjustments and keeps the project running smoothly, whether you’re handling it alone or coordinating with a professional.
Have the light fixture ready
If you’re hiring an electrician, buy the new fixture in advance. Having it on-site allows for a seamless installation in a single visit, saving you both time and potential additional costs.
Conclusion
Installing a new ceiling light in a room is a cost-effective and simple enhancement that can significantly improve any space. We love how our lounge looks with the new chandelier, which also adds much-needed illumination.
If you plan to wire your own ceiling light, remember to follow all necessary safety measures and consult an electrician or installation guide before starting. With the right tools and knowledge, setting up a new light fixture can be an easy DIY project for any room in your home.
Source of image:
- [1]: https://www.checkatrade.com/blog/wp-content/uploads/2023/06/Change-light-fixing.jpeg
- [2]: https://contentgrid.homedepot-static.com/hdus/en_US/DTCCOMNEW/Articles/how-to-add-a-wall-switch-to-a-ceiling-fixture-step-8.jpg
- [3]: https://www.familyhandyman.com/wp-content/uploads/2017/06/FH10MAY_508_06_034-1200.jpg?fit=640%2C824
- [4]: https://static1.squarespace.com/static/5be9bbd22971147cb7a5b687/5bea09f357727063897ba4f9/5d8e84b9971b0d04061c4830/1572989506203/The+Grit+and+Polish+-+Farmhouse+Laundry+Rm+-+Centering+a+Light+Fixture+1.jpg?format=1500w
- [5]: https://cdn.shopify.com/s/files/1/0598/6264/6964/files/led2_1024x1024.webp?v=1709344283