How To Remove Ceiling Light Cover No Screws?
hello rowabiEver looked up at your ceiling light, ready to change a bulb or give it a good cleaning—only to find there aren’t any screws holding the cover in place? You’re not alone! Ceiling lights come in countless designs, from simple flush mounts to eye-catching pendants, and sometimes the covers are cleverly engineered to pop right off—if you know the trick.
In this guide, we’ll show you exactly how to remove a ceiling light cover without screws. With a few handy tips, the right tools, and a bit of confidence, you can tackle this task quickly and easily—no frantic twisting or guesswork required! Let’s get started and shed some light on the process.
- How to remove ceiling light cover no screws
- Inspect the fixture
- Remove the cover
- Exert force on the borders
- Unplug any cables or wires
- Change the light bulb
- Reinstall the ceiling light cover
- Remove plastic ceiling light covers with screws
- Step 1: Use a step stool or ladder
- Step 2: Hold the light cover in place
- Step 3: Remove the screws or knob
- Step 4: Take off the light cover
- Step 5: Replace the bulb
- Step 6: Reinstall the light cover
- How do you remove a flush mount ceiling light cover?
- What you’ll need
- Step-by-step guideline
- Step 1: Set up your ladder or stool
- Step 2: Switch off the power
- Step 3: Put on gloves
- Step 4: Remove the trim (if applicable)
- Step 5: Detach the light cover
- Step 6: Replace the light bulb
- Step 7: Reinstall the light cover
- Step 8: Restore power and test the light
- How do you remove a semi-flush mount ceiling light cover?
- How do you remove a stuck ceiling light cover?
- What is the process for removing the cover from my light fixture?
- Indentation or channel system (slot or groove)
- Spring mechanism
- Clipping mechanism
- Screw-on retainer
- Slot connectors
- Faqs: How to remove ceiling light cover no screws?
- Conclusion
How to remove ceiling light cover no screws
Removing a ceiling light cover that has no visible screws may seem confusing at first, but with the right approach, it's a simple process. Whether you need to change a bulb or clean the fixture, follow these steps to safely and efficiently take off the light cover.
Inspect the fixture
Before attempting to remove the light cover, take a moment to carefully inspect the fixture. Ceiling light covers without screws are typically secured in one of two ways:
- Clips: The cover may be held in place by small metal or plastic clips on the sides.
- Twist-and-Lock Mechanism: Some covers are designed to twist off with a gentle rotation.
Understanding how the cover is attached will save you time and prevent accidental damage.

Carefully examining the fixture will help you determine the correct method. Source: The Home Depot (1)
Remove the cover
If your light cover is secured with clips, gently detach the clips by pressing or sliding them out of place. There are usually two to three clips holding the cover. Be cautious to avoid bending or breaking the clips as you remove them.
For fixtures with a twist-and-lock design, grip the cover firmly and rotate it counterclockwise. The cover should loosen and come off with minimal effort. If it feels stuck, don’t force it—move on to the next step to loosen it safely.
Exert force on the borders
If the cover doesn’t come off easily, it may be slightly stuck due to dirt, paint, or age. In this case, gently apply pressure to the edges of the cover. You can use a rubber mallet to tap the edges lightly. This helps dislodge any debris or paint that may be holding the cover in place. Be gentle to avoid cracking the cover or damaging the fixture.

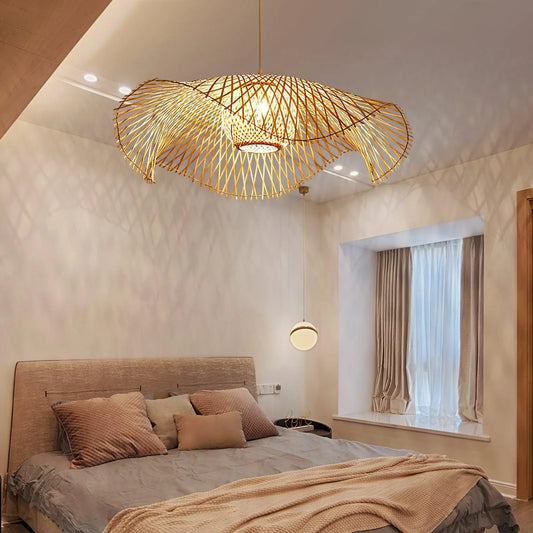
Avoid excessive force, as this could damage the fixture or the ceiling. Source: Designheure (2)
If you’re using your hands, press evenly on the cover’s borders to loosen it. Avoid applying too much force, as this could cause the glass to break.
Unplug any cables or wires
Once the cover is removed, check for any wiring connections or cables linked to the cover, especially if your light has an integrated LED panel or a smart feature. If wires are connected, disconnect them carefully. Make sure the power is off at the circuit breaker before handling any wires to avoid electrical hazards.
After disconnecting, inspect the wiring and fixture for damage. If you notice any frayed wires or loose connections, contact a licensed electrician to fix the issue before reinstalling the cover.
Change the light bulb
With the cover removed, you can now replace the light bulb. If the bulb is shattered, wear protective gloves to avoid injury and carefully remove the broken pieces. For regular bulbs, unscrew the old bulb and install a new one that matches the fixture’s specifications.
Make sure to follow the manufacturer’s instructions for the type of bulb you’re using (LED, halogen, etc.) to ensure compatibility and safety.

Grasp the bulb gently but firmly, twist counterclockwise, or pull straight out. Source: IOS Lighting (3)
Reinstall the ceiling light cover
After replacing the bulb or cleaning the cover, it’s time to reinstall the ceiling light cover. Follow the removal steps in reverse:
- If your cover uses clips, snap them back into place.
- If your fixture has a twist-and-lock mechanism, align the cover properly and rotate it clockwise until it locks securely.
Make sure the cover is firmly in place to avoid it falling or becoming loose over time.
Remove plastic ceiling light covers with screws
Removing a plastic ceiling light cover with screws is a simple process, but it requires careful handling to avoid damaging the cover or the fixture.

Plastic covers can become brittle over time, so handle them gently to avoid cracks or breakage. Source: Apartment Therapy (4)
Step 1: Use a step stool or ladder
To access the ceiling light fixture, you’ll need a secure step stool or ladder. Make sure it’s positioned on a stable surface to prevent any accidents. Always ensure you can reach the fixture comfortably without overextending yourself.
Step 2: Hold the light cover in place
Once you’re in position, use one hand to hold the plastic ceiling light cover to prevent it from falling as you remove the screws. Light covers can sometimes be heavier than they appear, so having a firm grip is essential to avoid drops or damage.
Step 3: Remove the screws or knob
With your free hand, turn the knob or screws counterclockwise to loosen them. Some fixtures have a central knob, while others have multiple screws holding the cover in place. If the screw or knob feels stuck, check for a retaining washer—a small piece that holds the cover securely. Use a flathead screwdriver to gently pry off the washer if needed.
Step 4: Take off the light cover
Once the screws or knob are completely removed, gently pull the plastic light cover away from the fixture. In some cases, the cover may have a thread or catch mechanism, requiring you to twist it counterclockwise to release it. Be careful not to apply too much force, as plastic covers can crack or break under pressure.
Step 5: Replace the bulb
With the cover removed, you can now replace the light bulb. Make sure you use a bulb that matches the fixture’s specifications in terms of wattage and type (e.g., LED, halogen, or incandescent). Follow the manufacturer’s instructions to ensure a proper fit and safe usage.
Step 6: Reinstall the light cover
After replacing the bulb, reinstall the plastic ceiling light cover by following the removal steps in reverse:
- Hold the cover in place with one hand.
- Insert each screw one at a time and turn them clockwise to secure the cover. If your fixture has a knob, tighten it until the cover is firmly attached.
- Avoid over tightening, as this can crack the plastic. Instead, gently push the cover into place and tighten just enough to keep it secure.
How do you remove a flush mount ceiling light cover?
Flush mount ceiling light covers are commonly found in bathrooms and other rooms where space-saving fixtures are preferred. These covers are often secured by spring clips, making them easy to remove without screws. Whether you're replacing a bulb or cleaning the fixture, follow this step-by-step guide to safely remove and reinstall your flush mount ceiling light cover.

Some covers may combine multiple securing methods, so inspect thoroughly. Source: Physics Forum (5)
What you’ll need
- Durable step ladder or stool: To safely reach the ceiling.
- Gloves: For a secure grip and to protect your hands from sharp edges.
- Needle-nose pliers: to remove spring clips if necessary.
- Flashlight: Helpful when the power is off.
Step-by-step guideline
Grab your tools and get right to the main part of the project:
Step 1: Set up your ladder or stool
Place a sturdy step ladder or stool under the light fixture to ensure you can comfortably reach the cover. Make sure the ladder is positioned on a stable, flat surface to avoid accidents.
Step 2: Switch off the power
Turn off the main circuit breaker to cut power to the light fixture. This is essential for safety to prevent electrical shocks while you work. If the light fixture is connected to a switch, make sure it's in the "off" position as well.
Step 3: Put on gloves
Wear protective gloves to get a better grip on the smooth surface of the light cover and to protect your hands in case the cover breaks. Gloves can also help keep the light cover clean and free of fingerprints.
Step 4: Remove the trim (if applicable)
If your light fixture has a trim piece around it, you’ll need to remove it to access the cover. The trim is often secured with spring clips.
- Use needle-nose pliers to gently pull out the spring clips one by one.
- Be careful not to bend or damage the clips, as they will need to be reinstalled later.
Step 5: Detach the light cover
To remove the cover, grasp the edges firmly and press down while simultaneously pulling it away from the fixture.
- You may need to apply a bit of pressure to release the spring clip mechanism holding the cover in place.
- If the cover feels stuck, try gently rotating it or tapping it lightly with your hand to loosen it.
Don't worry about breaking the cover—it’s designed to be removed with some force and will not get damaged if handled carefully.
Step 6: Replace the light bulb
Once the cover is off, you can remove the old light bulb and replace it with a new one.
- Avoid touching the glass part of the new bulb with your bare hands, as oils from your skin can reduce the bulb’s lifespan.
- Use a clean cloth or wear gloves to handle the new bulb.
- Wipe away any dust or debris from the inside of the fixture before installing the new bulb to keep your light shining bright.
Step 7: Reinstall the light cover
After replacing the bulb, reinstall the light cover by following the removal steps in reverse.
- Align the cover with the fixture and press it into place until you hear a click from the spring clips.
- If you removed any trim pieces, reattach them securely around the fixture.
- Ensure the cover is properly seated and that the spring clips are holding it tightly to prevent it from falling.
Step 8: Restore power and test the light
Turn the circuit breaker back on to restore power.
- Flip the light switch on and off a few times to confirm that everything is working correctly.
- If the light doesn’t turn on, check that the bulb is properly installed and that the cover is securely in place.
How do you remove a semi-flush mount ceiling light cover?
This type of lighting is typically seen in kitchens, hallways, and restrooms. If there are no visible screws, your fixture may be spring-loaded. Due to limited access, some can be challenging to detach.

Always keep one hand on the cover while removing screws, knobs, or clips to prevent it from falling. Source: Home Improvement Stack (6)
However, many have internal spring-loaded clips within the globe that you need to push outward while holding the globe steady.
- Spring-loaded flush-mounted light fixtures feature two springs that secure the metal collar.
- Use a flat-head screwdriver or a razor knife to gently scrape around the metal collar where it connects to the ceiling to loosen any paint.
- Gently pull down on the light fixture with your hands to release it from the springs.
- If you can't remove the fixture by hand, try sliding a flat-head screwdriver or knife under the metal ring and pulling downward.
- While replacing the bulb, the light fixture will remain in position. Just take out the old bulb to install a new one, ensuring you do not touch the glass part of the bulb with your fingers.
- Reinstall the bathroom lamp fixture by pushing it back into its original spot.
How do you remove a stuck ceiling light cover?
Removing a stuck ceiling light cover can be tricky, but a few extra tips can make the process easier. First, inspect the cover for hidden locking mechanisms. Some covers use twist-and-lock systems that require a gentle counterclockwise turn, while others are secured by spring clips. Look for small tabs or clips around the edges and use needle-nose pliers to loosen them if necessary.
Dirt, paint, or debris can also cause the cover to stick. Over time, these materials may create a seal around the fixture. To loosen it, gently tap the edges of the cover with a rubber mallet or soft cloth. If there’s dried paint holding it in place, carefully run a utility knife along the edges to break the seal without damaging the fixture.

Wipe away any excess lubricant with a cloth after the cover is removed. Source: Youtube (7)
If the cover is still tight, applying a small amount of lubrication can help. Use silicone spray or WD-40 around the edges and let it sit for a few minutes to loosen any stuck areas. Wipe away any excess lubricant with a cloth after the cover is removed.
When removing the cover, apply steady, even pressure rather than forceful pulling. Press down on the edges while pulling the cover away from the fixture. If one side loosens first, work your way around until the cover detaches fully. Be mindful of fragile covers, especially older ones made of thin plastic or glass. Wear gloves to protect your hands in case the cover cracks.
Once the cover is off, take a moment to clean the light fixture to prevent dust buildup. Wipe the fixture with a soft cloth and inspect the wiring for any visible damage. To avoid future sticking, apply a small amount of petroleum jelly or silicone spray to the edges of the cover before reinstalling it. This will help prevent dirt, dust, and paint from creating another seal.
What is the process for removing the cover from my light fixture?
Removing a ceiling light cover without screws can be tricky if you're not familiar with the type of fixture you’re dealing with. Different ceiling lights use various mechanisms to secure the cover, such as spring clips, grooves, or retainer screws. Below is a clear guide on the most common types of ceiling light covers and how to safely remove them.
Indentation or channel system (slot or groove)
Some ceiling light covers are held in place by a groove or channel on the fixture. To remove the cover, look for a slot or indentation where the cover connects to the fixture.
Use a putty knife or plastic trim tool to gently lift the edge of the cover. Avoid using a metal tool like a pry bar to prevent damage to the cover or ceiling. Once the cover is loose, carefully inspect the wires underneath before fully detaching it.
Tip: Always turn off the power at the breaker before handling any wires.
Spring mechanism
The spring mechanism is one of the most common ways to secure ceiling light covers. The cover is attached to the base of the fixture using small metal springs.
To remove the cover, gently push up on the bottom of the cover and tilt it to one side to release the springs. Be cautious, as there may be wires or electrical connections behind the cover. Ensure the power is off before removing the cover to avoid accidents.
Clipping mechanism
Some light covers are secured by small clips that hold them in place. These clips are typically spring-loaded or snap-on.
To release the cover, press down on one side of the clip while gently pulling the opposite side to open it. If the cover feels stuck, use a putty knife or plastic tool to assist in prying it open. Handle the clips gently to avoid breaking them.
Screw-on retainer
Many ceiling lights with glass shades or diffusers use a threaded retainer to secure the cover. This is a common method for flush-mount fixtures.
Use a flat-head screwdriver to loosen the retainer by turning it counterclockwise. If the retainer is too tight, you can use needle-nose pliers to grip and twist it. If the cover still won’t budge, a utility knife can help loosen any paint or dirt sealing the retainer to the ceiling. Insert the blade between the cover and ceiling, then gently twist to loosen it.
Slot connectors
Some ceiling light covers use slot connectors that require specific tools to loosen. These connectors are often found in bathroom fixtures or recessed lights.
Use a putty knife to gently pry the slot connector until it releases. If necessary, use needle-nose pliers to twist the connector and remove it from the fixture. Once the connector is loosened, the cover should detach easily.
Faqs: How to remove ceiling light cover no screws?
How do you remove a ceiling light cover without screws or clips?
- To remove a ceiling light cover without screws or clips, gently turn the cover counterclockwise to loosen it. If it’s stuck, you can use a flat tool to carefully pry it loose without causing any damage to the cover.
How to remove lights from a ceiling without screws?
- You can try using a knife to pry around the edge of the light fixture to loosen it. If that doesn’t work, consider purchasing acetone (like Nail Polish Remover with Acetone) along with a syringe or turkey baster to squirt acetone between the light fixture and the ceiling.
Conclusion
Removing a ceiling light cover without screws is usually not overly complicated, provided you use the correct techniques and have some patience. There are various approaches you can attempt to take off a screw less ceiling light cover.
You might find success by trying methods such as twisting and pulling, using a tool to pry it open, employing suction cups, or pushing it upward if clips are present. These techniques can help you remove the cover safely and efficiently.
It's important to be careful and consider consulting a professional if you're unsure about the best method for your particular situation.
Source of image:
- [1]: https://dam.thdstatic.com/content/production/IZtKH0bVLXlenIeP74KdVg/nylH9ZcAyhKzS7hetfO8yw/Original%20file/how-to-hang-a-light-fixture-step-6.jpg
- [2]: https://www.designheure.com/cache/images/product/2_tower_suspension_petit_on_bd5-12645.jpg
- [3]: https://www.ioslighting.co.uk/wp-content/uploads/2022/11/Untitled-design-97.png
- [4]: https://cdn.apartmenttherapy.info/image/upload/f_jpg,q_auto:eco,c_fill,g_auto,w_1500,ar_4:3/at%2Farchive%2F4d150eb9d4824ee2f66a3d05ee700f14048ddf45
- [5]: https://www.physicsforums.com/attachments/imageuploadedbyphysics-forums1441938896-619699-jpg.88527/
- [6]: https://i.sstatic.net/zku9s.jpg
- [7]: https://i.ytimg.com/vi/GdbmOJPGk_s/hq720.jpg?sqp=-oaymwE7CK4FEIIDSFryq4qpAy0IARUAAAAAGAElAADIQj0AgKJD8AEB-AHUBoAC4AOKAgwIABABGGUgZShlMA8=&rs=AOn4CLCZDhNOf9WUM__hR0-K23GC44aSTQ